Unity is, undeniably, one of the most popular game development engines today. It has empowered countless developers to create stunning and engaging games across many genres. Today, we want to focus on how to develop a 2D game in Unity.
So if you are new to game development, this guide will walk you through the fundamental steps of creating your very own 2D game using Unity.
How to develop a 2D game in Unity: first steps
Start by, of course, downloading the Unity Hub from the official Unity website and installing the version you prefer. Unity Hub makes it easier to manage your projects and different Unity versions.
Open Unity Hub, click “New” to create a new project, and choose a project name and location. Make sure to select the 2D template to set up your project for 2D game development.
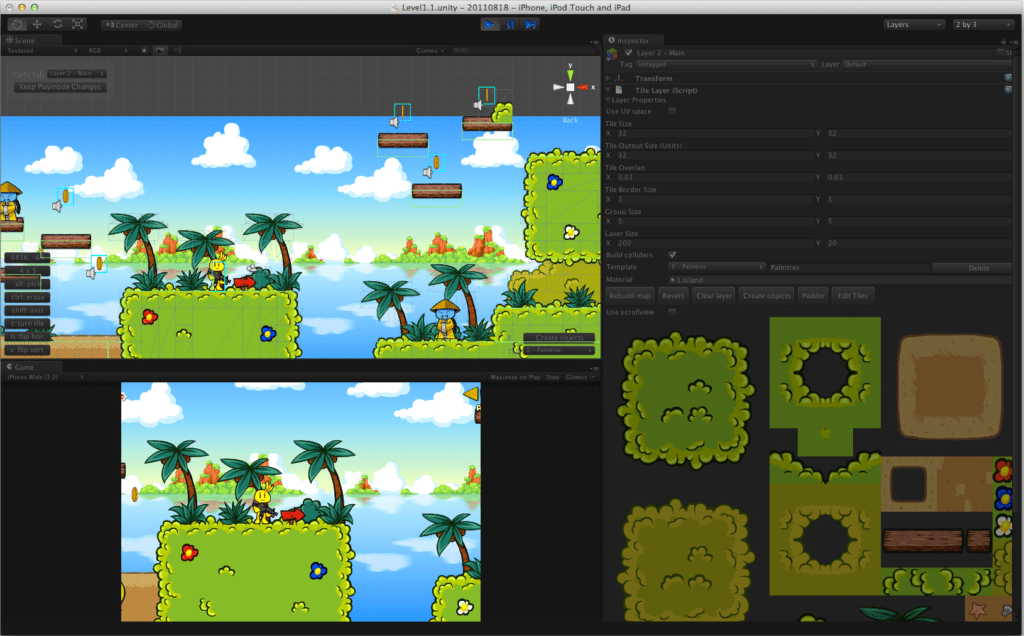
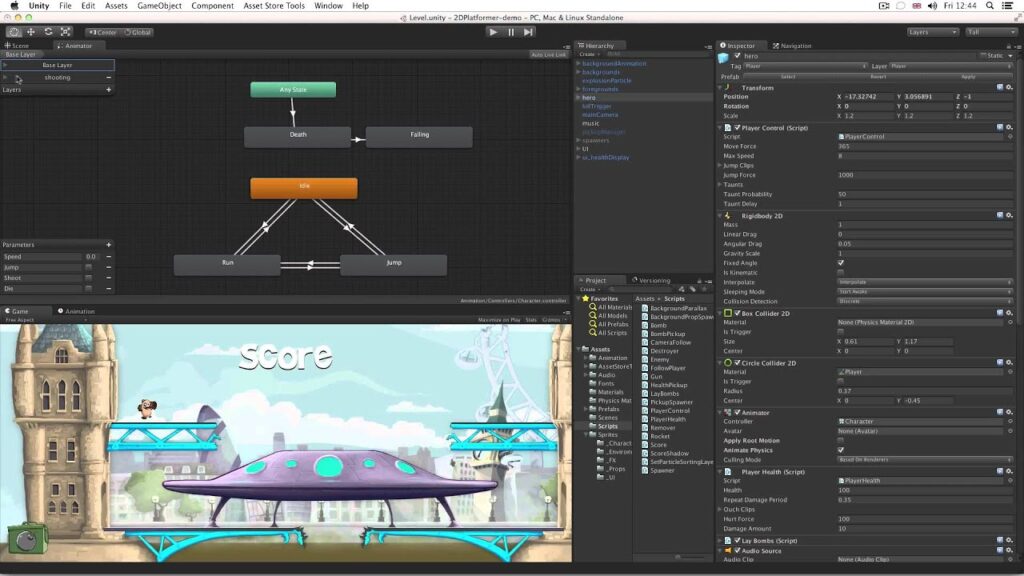
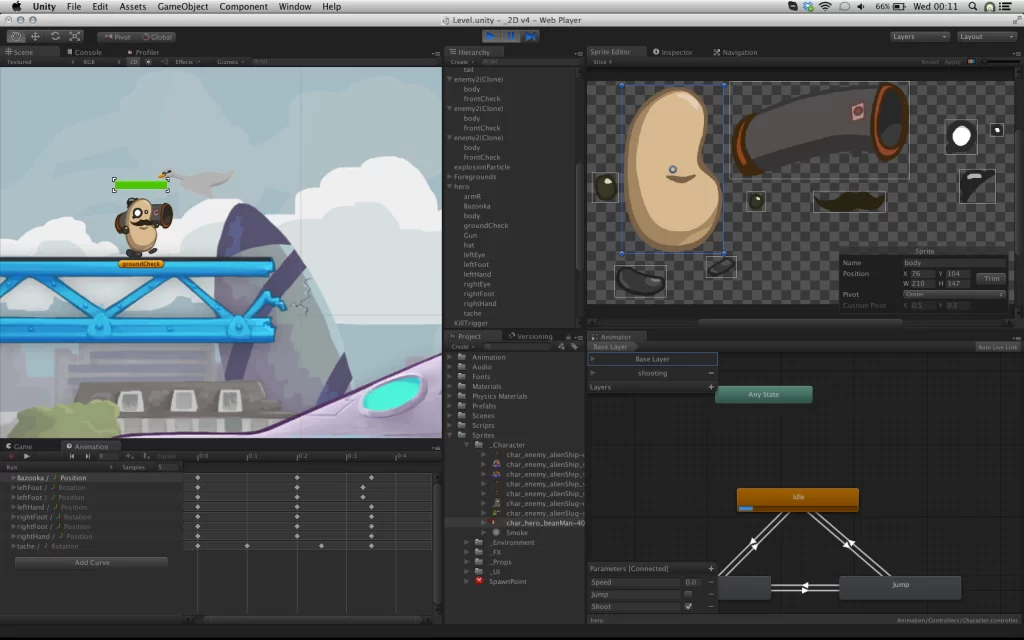
Becoming acquainted with the interface is a crucial first step in learning how to develop a 2D game in Unity. Unity provides an array of interconnected views, each serving a distinct purpose to streamline your creative process.
Scene view
The Scene view serves as your creative canvas, where the magic of your game scenes comes to life.
Here, you wield the power to shape and design your virtual world, placing and manipulating objects, terrains, lights, and other elements.
Take your time to explore its tools and practice by adjusting object positions, orientations, and scales, while also fine-tuning lighting and camera angles to achieve your desired visual aesthetics.
Game view
Step into the shoes of a player and preview your game’s potential firsthand in the game view.
This dynamic window provides a real-time representation of your game’s appearance and behavior. Walk through your levels, assess gameplay mechanics, and validate your design choices.
This invaluable tool enables you to catch any inconsistencies or design flaws early in the development process, ensuring a polished end product.
Hierarchy view
The hierarchy view acts as a map of your scene’s structure, displaying all the game objects present and their parent-child relationships.
This hierarchical representation simplifies management, making it effortless to organize and navigate through your scene’s components.
Create a tree-like structure by parenting objects together, facilitating efficient modification and manipulation. Moreover, the hierarchy view allows you to enable or disable objects, granting fine-grained control over what’s visible in the scene and game views.
Inspector view
Delve into the heart of your game objects with the inspector view, your gateway to modifying object properties, and also a crucial step in becoming a master on how to develop a 2D game in Unity.
Select any object in the hierarchy, and the inspector unveils a treasure trove of parameters and settings.
Whether it’s adjusting a character’s speed, altering a material’s color, or defining a sound effect’s volume, the Inspector empowers you to finely tune every aspect of your game elements.
Furthermore, in the inspector panel, you can also attach scripts to objects, implementing custom behavior and interactivity.
Creating a player character
Now that you are familiar with the program, it is time to create a player character, the first big step on how to develop a 2D game in Unity.
Begin by sourcing or crafting high-quality 2D sprite assets that will represent your player character in the game world. These assets can be acquired from graphic design software or online repositories.
Once you have your sprite assets ready, navigate to your project’s “Assets” folder and effortlessly import the chosen sprite assets.
You can achieve this by performing a simple drag-and-drop action, where you drag the sprite files from your computer’s file explorer directly into the “Assets” folder within the Unity project.
Player object
With your sprite assets in place, you can now proceed to establish the necessary infrastructure for the player character.
Next, open the hierarchy view within Unity. Here, you will create the foundation for your player character. Begin by right-clicking within the Hierarchy window and selecting “Create Empty.”
This action generates an empty GameObject that will serve as the basis for your player character. Rename this GameObject as “Player” to improve clarity and organization.
The next step involves associating the visual representation with the GameObject you’ve just created.
To do this, drag and drop one of the previously imported sprite assets onto the “Player” object within the hierarchy window. This action binds the sprite to the GameObject, endowing it with the visual identity of your player character.
Physics behavior
To ensure the player character interacts with the game world convincingly, it’s important to introduce appropriate physics components and parameters.
To do that, attach a Rigidbody2D component to the “Player” GameObject. This component endows the player character with physics attributes, allowing it to react to forces, collisions, and gravity within the game environment.
Now you can tweak the Rigidbody2D settings as necessary.
You can modify parameters like gravity scale, mass, and drag to fine-tune the player character’s physics behavior. Adjusting these settings will have a significant impact on how the character responds to movements and external forces.
Player Controls
For the player to interact with and control the character effectively, you need to develop a script that governs the character’s movements.
Create a custom script that manages the player’s movement. One approach involves utilizing Unity’s Input class to detect keyboard inputs. By reading these inputs, you can orchestrate the player character’s movement in response.
Within the script, monitor the Input class to identify key presses, such as arrow keys or WASD for movement. Translate these inputs into directional movement commands for the player character.
The next step is to implement the movement logic by altering the player character’s position based on the received input. You can multiply the input values by a movement speed factor to regulate the character’s pace.
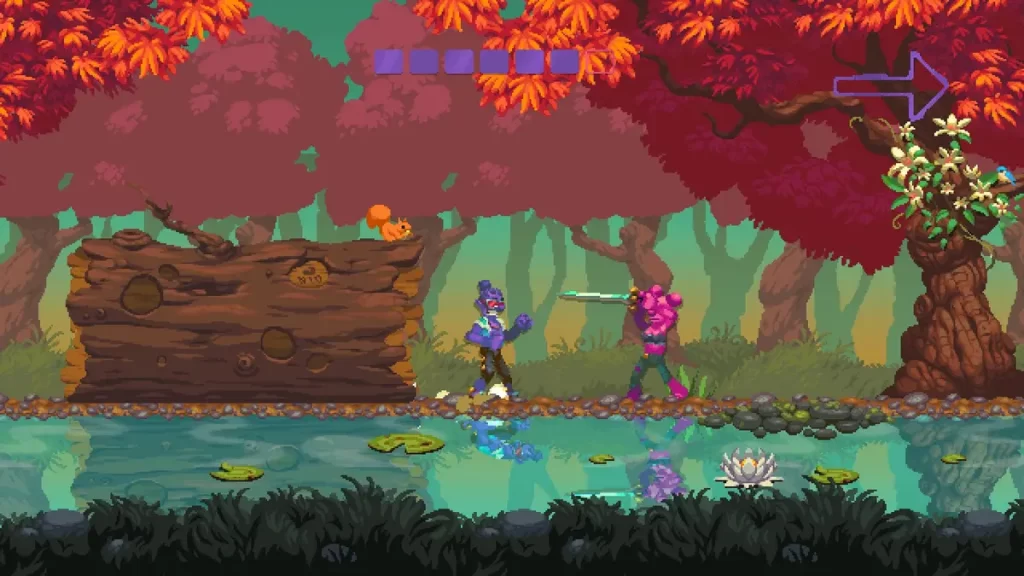
Designing your environment
Creating immersive 2D environments is a fundamental aspect of how to develop a 2D game in Unity.
In Unity, developers can achieve this by importing background images, designing tile-based maps, and implementing colliders to enable player interaction.
Background Images
Background images serve as the visual foundation of your game world. They set the mood, theme, and overall atmosphere of the environment.
Start by importing your background images into Unity’s project folder. These images could include landscapes, cityscapes, or any other scenery that fits your game’s narrative.
Next, create an empty GameObject to act as a container for your background. Attach a Sprite Renderer component to this GameObject, assign the imported image as its sprite, and adjust the GameObject’s position and scale to fit the desired visual composition.
For added depth and immersion, consider implementing a parallax scrolling effect, where multiple layers of background images move at different speeds as the player progresses through the game.
Tile-based maps
Unity’s tilemap system greatly simplifies the creation of 2D platformer environments, floors, and terrains. It is a pivotal component to understand when it comes to how to develop a 2D game in Unity.
Start by creating a new tilemap GameObject by navigating to GameObject > 2D Object > Tilemap. This GameObject will serve as the canvas on which you’ll paint your tiles.
Open the tile palette window to manage and organize your tiles. Here you can also import tiles or create your own using sprite assets.
Select a tile from the tile palette and use the brush tool to paint the tiles onto the tilemap GameObject. This process allows you to build platforms, ground, walls, and other structural elements of your environment.
Implementing colliders
To make the environment interactable and enable player movement and collision detection, you need to add 2D colliders to your tile-based elements.
Unity offers several 2D collider models, including Box Collider 2D, Circle Collider 2D, and Polygon Collider 2D. Choose the appropriate collider type based on the shape of your tile elements.
Attach colliders to the GameObjects containing your tile-based elements. Ensure that colliders align accurately with the visual representation of the tiles to provide a seamless player experience.
Implement character control scripts that allow the player to move and jump. Utilize Unity’s Physics2D system to detect collisions between the player’s collider and the environment’s colliders, enabling the player to stand on platforms and navigate the game world.
Adding game elements
At this point, you have the basics: a character and the background. So now let’s talk about adding other game elements.
These elements could be rocks, walls, enemies, or any other elements that obstruct the player’s progress. They add depth and challenge to your game.
Setting up GameObjects
Just like you made sprites for the player character, choose or create sprites that match the aesthetic and theme of your game. Ensure that the sprites have transparent backgrounds and are of appropriate sizes.
In the hierarchy view, create new GameObjects for each obstacle or enemy. This will serve as a container for the sprite and associated components.
Attach the imported sprite to the GameObject as a sprite renderer component. Adjust the scale and rotation to fit your game’s world seamlessly.
Set the initial positions of the GameObjects in the scene. Consider strategic placements that challenge the player’s navigation skills and enhance gameplay dynamics.
Depending on the behavior you desire, add colliders to the GameObjects. For instance, if the player should collide with obstacles, attach a Collider2D or Collider3D component accordingly.
This step enables interaction with the obstacles, often the core gameplay experience of 2D games, and can involve various mechanics.
Adding interactions
The first step to creating these interactions is to create a new folder in your project specifically for scripts. This helps keep your project organized and easy to manage.
Write scripts to manage collisions between player characters and obstacles/enemies.
Attach a “Rigidbody” component to the player if physics-based interactions are desired. Then, implement “OnCollisionEnter” or “OnTriggerEnter” functions to respond to collisions.
This could result in health deduction, score updates, or even triggering game-over scenarios.
Improving interactions
Consider using an event-driven architecture to handle interactions. This can make your code modular and flexible, allowing various game elements to communicate without tight coupling.
Enhance interactions with visual and audio feedback. When a collision or interaction occurs, you can trigger animations, particle effects, and sound effects to provide a more immersive experience.
Regularly playtest your game to ensure that interactions feel intuitive and balanced. Adjust variables like health points, scoring mechanisms, and obstacle placement based on feedback.
Mastering 2D Game Development in Unity: A Comprehensive Beginner’s Tutorial
In this comprehensive tutorial, beginners will learn how to make a 2D game in Unity through a step-by-step guide. Utilizing resources such as YouTube tutorials, Unity’s extensive documentation, and the supportive Unity community, users will embark on their journey to create their first 2D game. With Unity’s intuitive workflow and built-in UI tools, even those new to game development can easily grasp concepts like optimization and user interface design.
Throughout each chapter of this tutorial, we will cover everything from creating simple 2D graphic objects to optimizing code for both mobile and desktop platforms. By the end, users will have a solid understanding of Unity 2D game development and be equipped to start creating their own games with confidence.
Practice makes perfect
These are the basics of how to develop a 2D game in Unity. From this point on, the more you practice and explore the functionalities of the platform, the better you’ll be able to create your games.
And trust us, there are a ton of functionalities in Unity. We here at Main Leaf have been working with Unity since our foundation in 2012 and have created countless games using the platform.
We know firsthand that one of the most important aspects of learning how to develop a 2D game in Unity is taking your time to explore all these functionalities.
So start your exploring today, and start your journey to becoming proficient in how to develop a 2D game in Unity.
If you liked this article, there are many more in our blog where you can learn a lot about game development and the game industry, so check it out.
