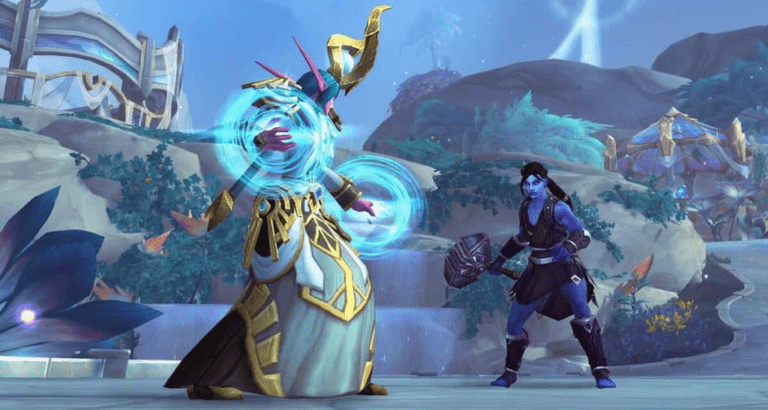
According to the Consumer Electronics Association, graphics DO play a part in their decision to either buy or play a game for 75% of gamers.
Even though everyone ranks graphics differently, it’s safe to say that a game with a stunning art style and high-quality, well-made assets is more likely to be successful than its not-so-pretty alternatives.
Just in case you don’t know, assets are everything that the player will see or hear during their gameplay. They include but are not limited to characters, environments, logos, background music, sound effects, shaders and so on.
As such, creating high-quality game assets that fit your game is no easy task. To add salt to the wound, getting started often feels daunting as there are many roads to the same destination and no clear path one should take.
For this reason, in today’s post, we will outline the general workflow that game artists use to create both 2D and 3D assets, going through the basics and suggesting some well-known softwares that are up to the task.
Without further ado, let’s get right into it!
2D assets for games
2D game assets are extremely versatile and come in a wide variety of styles. Depending on the tone of your game, you could go for more realistic 2D sprites, gorgeously stylized and hand-drawn assets like in Hollow Knight or go full retro with pixel art.
Creating simple 2D assets is also an extremely beginner-friendly way to get into the creation of game art as you don’t have to deal with the hassles that come with 3D modeling. That said, it’s still no easy task and will require some dedication and patience from you.
No matter what your choice of art style is, this workflow should work well for most purposes:
General workflow for designing 2D game assets
The very first thing you need to do is look up some reference images. Contrary to what most people think, looking references up is a good habit no matter what your artistic level is. Amateurs, professionals, and even the masters have done it before and will keep doing it for years to come.
If there are too many references, what about placing them on a moodboard like UI/UX designers do? You could use Canva or even paste them all into MS Paint just to have something to look at and reference down the line.
As soon as you have them ready, it’s time to get artsy!
Start by using basic 2D shapes (circles/ovals, triangles and rectangles) to define the overall shape/silhouette of whatever you’re creating. Skip the details – they are not important right now. You need to first create the bulk of your asset before assigning details to it.
Once that is done, define regions and refine them little by little, remembering to always start with the basic shapes. Then, you will want to add some base colors to your assets and, finally, add lights and shadows (shading). Rinse and repeat however many times necessary until you have enough game-ready assets for your game.

Software for creating 2D game assets
If you are going for a game with pixel art graphics, be sure to check Aseprite out. It’s a software designed specifically for creating pixel art and sprites for games and it’s a favorite among 2D game artists. Aseprite features layers, blend modes, tiled mode, custom brushes, a fully-fledged animation engine and lets you create sprite sheets, animated GIFs, a texture atlas and much more!
If you are instead looking to create gorgeous hand-drawn assets like the ones seen in Hollow Knight, you can’t go wrong with a software like Krita (free) or Adobe Photoshop (paid). If you ever need to manipulate pictures, GIMP is an amazing free alternative to Photoshop. Or, if you want your game to be created with vector graphics, be sure to check Inkscape out.
3D assets for games: general workflow
Beware, here be dragons!
It’s true that games are works of fiction, usually fruit of the imagination of game designers and brought to life by skillful developers and artists. However, this does not mean they can’t look astonishing. In fact, high-end games (such as Cyberpunk 2077 and Ghost of Tsushima) are becoming more realistic by the day, and there are no signs this trend will stop any time soon.
Being 3D games, they needed 3D models to populate the game and make it astounding. Relatively speaking, they are much harder to create than their 2D counterparts, but they often result in more immersive and realistic experiences.
As you will see, the general workflow for creating 3D assets for games is very long and requires multiple steps:
Drawing the 2D sketch
This step is optional, but it’s very important if you’re going to model a person, a creature, exotic vegetation or very complex objects. By creating a blueprint, you don’t have to rely on your imagination and guesswork to get distances and proportions right. You get extra points if you create a blueprint for different views, but usually a front-view perspective is enough.
Creation of high-poly model
You can do this in any 3D modeling software, such as Blender, Maya or Cinema 4D.
This first model needs to be very detailed and has everything that needs to be shown – and, thus, ends up being the most time-consuming process almost every time as almost everything needs to be created from scratch. Assuming you are going to put many hours of work a day, models that are extremely detailed can take days or even weeks to finish.
Daunting, we know.
A common way to go through this process is to first create a basic piece of geometry and then build details on top of it.
Models that are more complex may require the aid of a blueprint (like the one you might have drawn a step ago) in the background to keep proportions correct. Alternatively, if you need to create simpler models, opening an image on your second monitor and then using it as a reference to create your asset should be enough.
Sculpting
If your 3D model needs to display even more details that are not easily made in the aforementioned softwares – such as skin imperfections, slight deformations, scratches and so on – then you’ll have to sculpt it.
As such, this step is not mandatory for all models. However, chances are you will want to go through this process if you’re modeling a body part, vegetation or anything that has many smooth, organic shapes and lines.
To get started with sculpting, you will need to use a software like ZBrush, which can deal with millions of polygons at the same time, allowing you to add even more details to your models.
Sculpting might also be needed for environmental elements that cannot be created using only straight lines and flat polygons without losing their essence. Some examples of such elements are rocks, mountains and walls (especially weathered/cracked ones).

Low-poly model
The next step you need to go through is to make a low-poly model using your high-poly or sculpted model.
We can hear you ask “What?” from over here, but don’t worry!
Unless you want your asset to be the main cause of performance issues, then simplifying it without losing much of its essence is required.
This might seem contradictory, but our game engines and computers/consoles are not yet powerful to handle millions upon millions (or billions in extreme cases) of polygons and vertices at the same time due to limitations in memory and processing power.
As such, reducing their amount as much as possible while retaining the same overall shape, form and silhouette as your high-poly model will help you avoid this issue.
UV Unwrapping
Once the low-poly mesh has been created, the next step is to unwrap it into a UV map.
You might wonder what in the world a UV map is. Well, before we answer that, we have to talk about one of the main secrets of 3D asset creation: there is no such thing as a 3D texture and they are always created in-game using a 2D image!
Yeah, you heard that right. And this is where the UV map comes in: it translates your 3D mesh into 2D information that can be used to wrap a 2D texture around itself.
It might sound confusing, but it should be easy to understand. Have you ever assembled a cube by folding a paper cross before? It’s the same principle, only backwards!
Oh, before you ask, “UV” stands the horizontal and vertical axes of the 2D space. Using this convention, we avoid using the same letters already employed when referring to 3D space – X, Y and Z.
Whenever we speak about flattening 3D geometry, there will be seams – parts of the mesh that had to be split in the 3D to 2D UV map conversion. Unfortunately, you can’t avoid having seams when going through this process. After all, UV unwrapping is all about minimizing seams and distortions to the wireframe at the same time.
However, it’s possible to make seams less obvious! You can make them follow hard edges, hide them behind other parts of the model (such as hair/clothes/walls) or, as a last resort, hide them underneath/behind the focal point of your model.
It’s true that 3D modelers tend to find this process tedious, but it’s essential to the workflow. It’s also extremely important to get UV unwrapping right – mistakes will wreak havoc sooner or later as everything going forward is based on your UV map.
Naming the parts
This step is optional, but we always recommend you go through this process. Even if your model is simple, it’s a simple, but good practice that helps you develop your organizational skills.
Baking
Calculating lights and shadows in real time is an extremely expensive task for your CPU/GPU. For this reason, many modelers resort to baking, the process of saving complex surface effects as simple 2D bitmaps, which are then assigned to the objects.
If you create a library of baked texture maps, a variety of 3D effects on objects can be rendered in real-time without having to recalculate them over and over again. This is mostly used for lights and shadows, but can be used to store ambient occlusion, curvature, position and many other values.
Texturing
Once baking is done, your model will be ready for textures to be applied over it. The purpose of this step is to give the viewer a sense of material about the object you’re texturing. Many 3D modeling softwares already come with a wide variety of textures ready to be used, so don’t forget to check test them out before looking for more expensive, premium options.
Rigging
This step is only required if you need your model to be animated in some way – such as characters and monsters. It doesn’t matter what the object is – it could be a tree, a ship, a door – but, as long as it needs to be animated, you’ll need to rig it.
Simply put, rigging is the process in which a 3D model’s bone structure is created by connecting digital bones with each other, which can then be manipulated like a puppet in order to create an animation. Once rigged, 3D objects can be controlled and deformed to your heart’s content.
Placing the bones is the easy part since many bones will require additional work to be animated without issues. Some bones will require the artist to add Inverse Kinematics (IK) to them, which reverses the default Forward Kinematics property.
This is used mostly for arms, legs and other appendages, such as the tail of an animal. Proper IK setups will keep elbows and knees pointing in the correct direction no matter how connected bones are moving, making it easier for animators to create a realistic motion.
That is not all, however. Constraints are yet another essential element when it comes to rigging. Some bones need to have restrictions applied to their movement because, otherwise, it would create uncanny-looking situations, such as a foot being bent in ways they shouldn’t be.
This process can also be extremely time-consuming. It can take a few hours for basic models while rigging a complex model could take days or even weeks.
How do you create a game asset: Summing Up
Creating a game asset is an important part of the game development process. To create a game asset, you need to first have an idea of what the asset should look like and how it should function in your game. Then, you need to decide which modeling software to use such as Maya or Blender. Next, you will start creating the low-poly version of the asset using polygons and UVs. After that, you will texture your asset with textures that match its shape and form. Finally, you need to optimize your asset for efficient performance in your game by following a specific workflow. Once all these steps are done correctly, you can then export your game asset into a format that can be used in your game engine. Creating a game asset requires patience and attention to detail since it involves multiple steps from start to finish.
Conclusion
Now that we talked about the general workflow for creating both 2D and 3D assets, we hope you have a deeper understanding on how much work goes into the game’s art, one of the most fundamental aspects of games, and the basics of how to design assets for games.
As you can see, the process of creating assets for a game is one of the most time-consuming aspects of game development, often making up the bulk of its cost.
If you ever decide to dive deeper into the creation of art for games, good luck and be patient! Keep in mind that it’s possible to sell your assets on Unity’s and Unreal Engine’s stores, where thousands of creators put their creations up for sale and make some extra income every month.
However, we understand why one would rather not go through all these steps. As we have said before, making games is a very complex endeavor as it requires good understanding of many areas – programming, marketing, art and project management to name a few.
With that in mind, what about hiring a game development studio to help you bring your game idea to life? This way, you won’t have to deal with the nitty-gritty parts of making a game, leaving you free to work on marketing it to your target audience.
We at Main Leaf are experts in the area and have been creating games for over a decade now. With lots of experience under our belt, we make fantastic games on-demand according to our client’s specifications.
If you got interested, be sure to send us a message by requesting a quote. To do so, go to the top of this page and click on the green button on the top-right. We will get back to you as soon as we can!

